14.5.5.5. Configuration Example OpenScape SBC 


In this chapter an example configuration for the OpenScape SBC with
the Telekom Deutschland GmbH (TDG) - DeutschlandLAN SIP-Trunk is described.
In this case the OpenScape SBC registers itself to the DeutschlandLAN
SIP-Trunk instead of the OS4K gateway.
Further OpenScape SBC documentation (e. g. configuration of “Clustered
Mode” for connecting multiple Gateways and/or multiple OS4Ks), please
refer to the official OpenScape SBC Configuration Guide (such as OpenScape
SBC, Configuration Guide, Administrator Documentation).
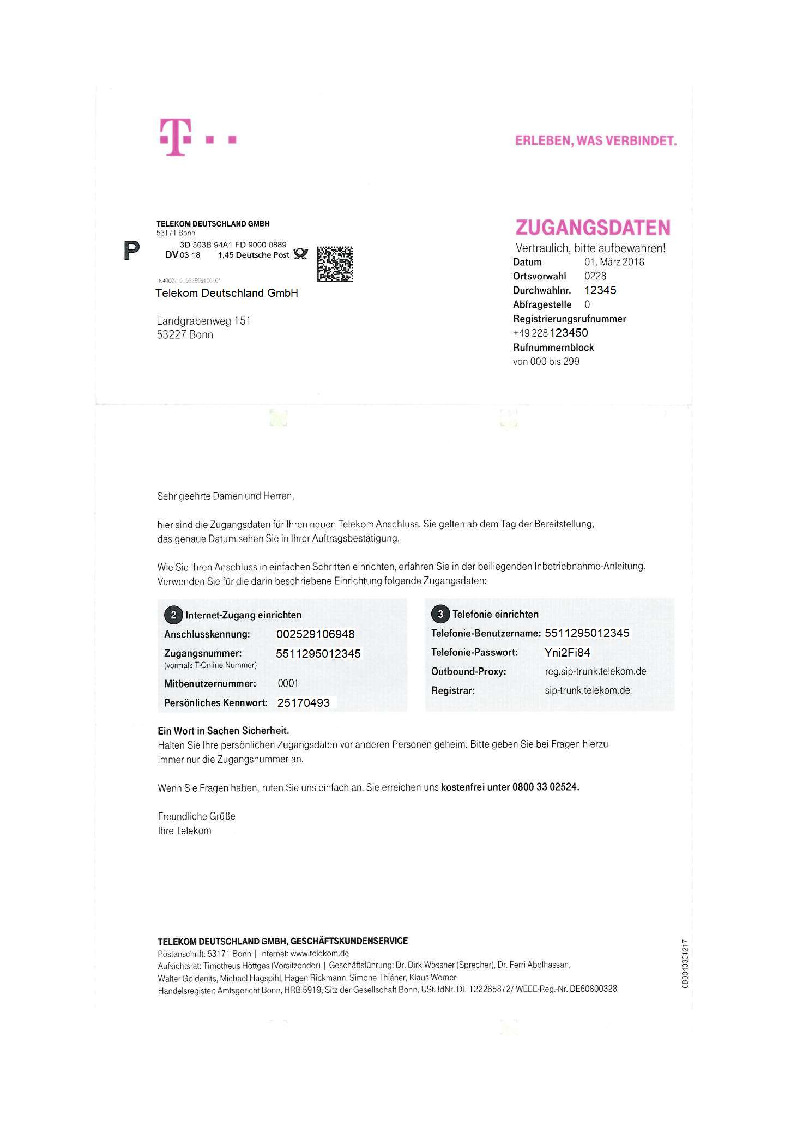
The configuration data needs to be taken from the Telekom letter:
Figure 262. Deutsche Telekom letter
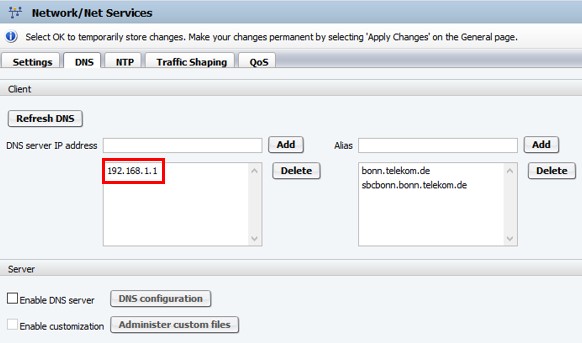
1. DNS
It must be configured a DNS server which can resolve the Telekom DNS
records configured in the Remote Endpoints:
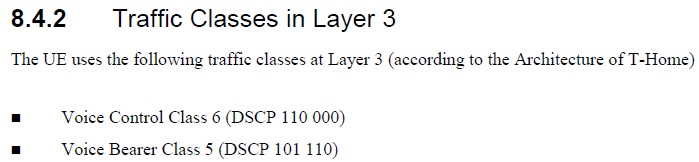
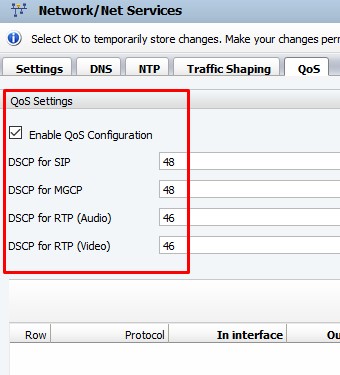
Figure 263. 2. Quality of Service (QoS)
Telekom has specified in their 1TR114 document QoS requirements which
must be applied on OpenScape SBC:
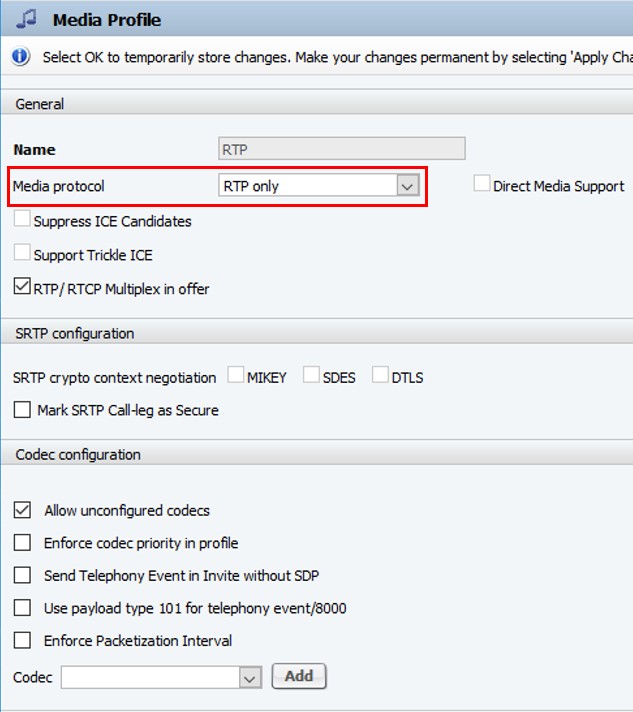
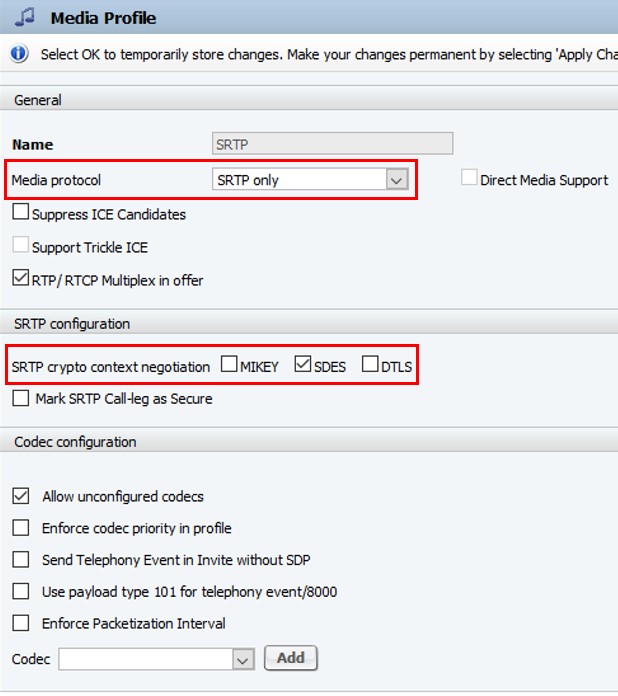
3. Media Profile
Depending on whether the SIP trunk is encrypted via TLS or not, one
of the two example Media Profiles in the screenshot need to be used:
Figure 264. For an unencrypted SIP trunk the Media Protocol RTP was used:
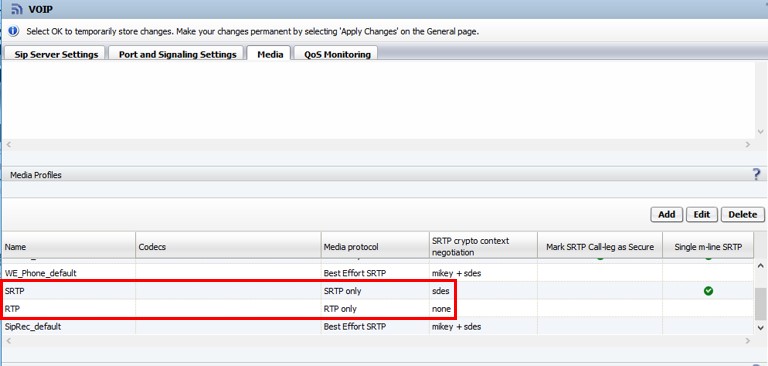
For
an encrypted SIP trunk the Media Protocol SRTP and SDES to negotiate
the cryptographic parameters was used. MIKEY may not be enabled because
it’s not supported by Telekom.
How
to activate the defined Media Profile for the SIP trunk is described
in the section Remote Endpoint below.
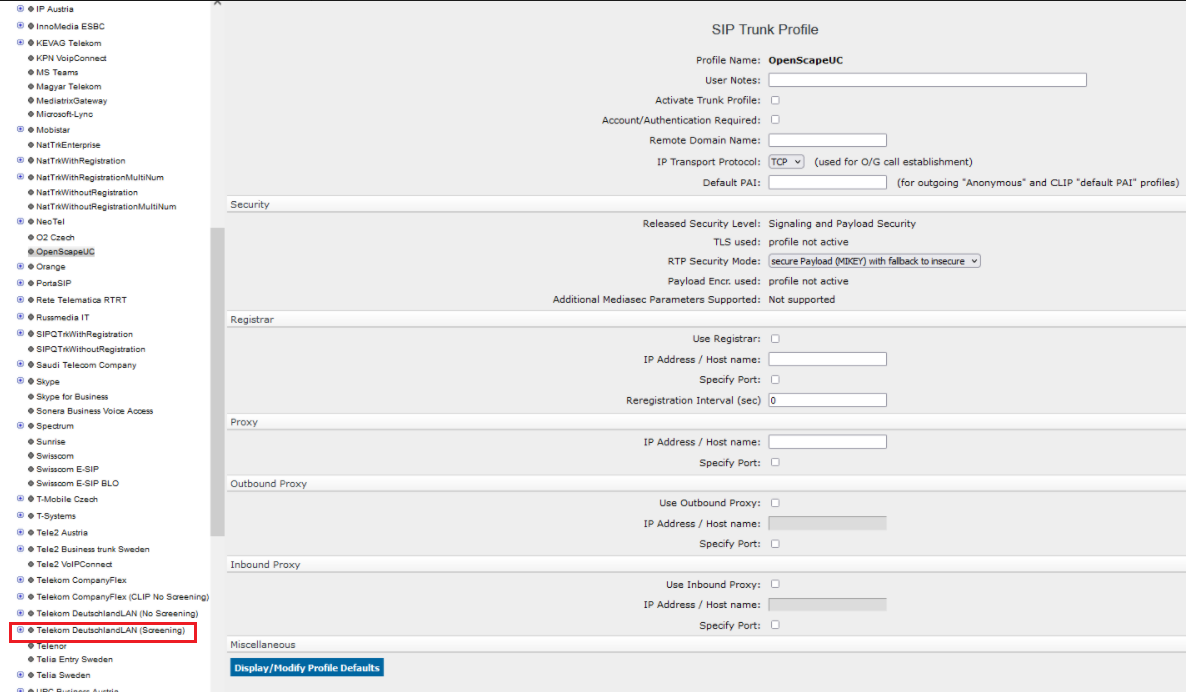
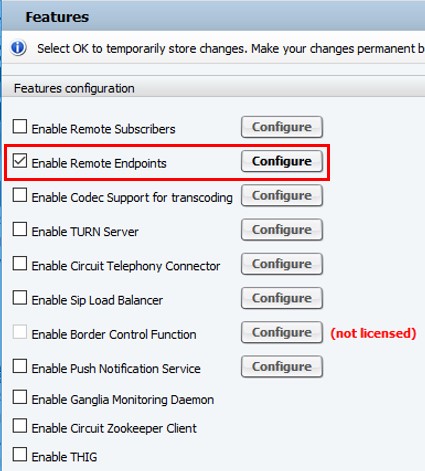
4. Remote Endpoint
On the OpenScape SBC must be activated Enable Remote Endpoints:
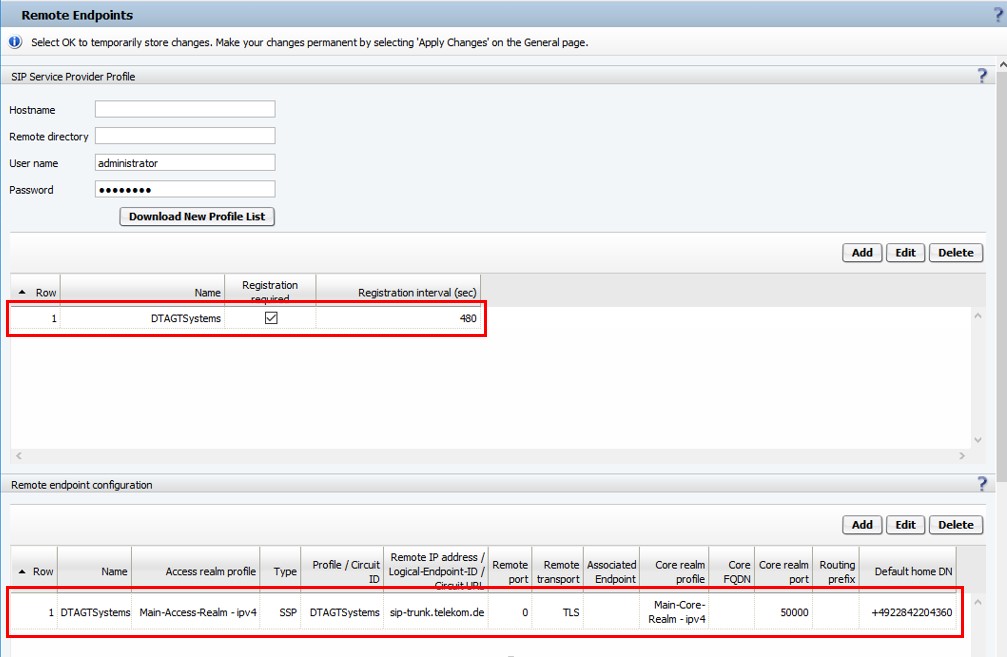
When
opening the Remote Endpoints window the SIP Service Provider Profile
and the Remote Endpoint has to be configured:
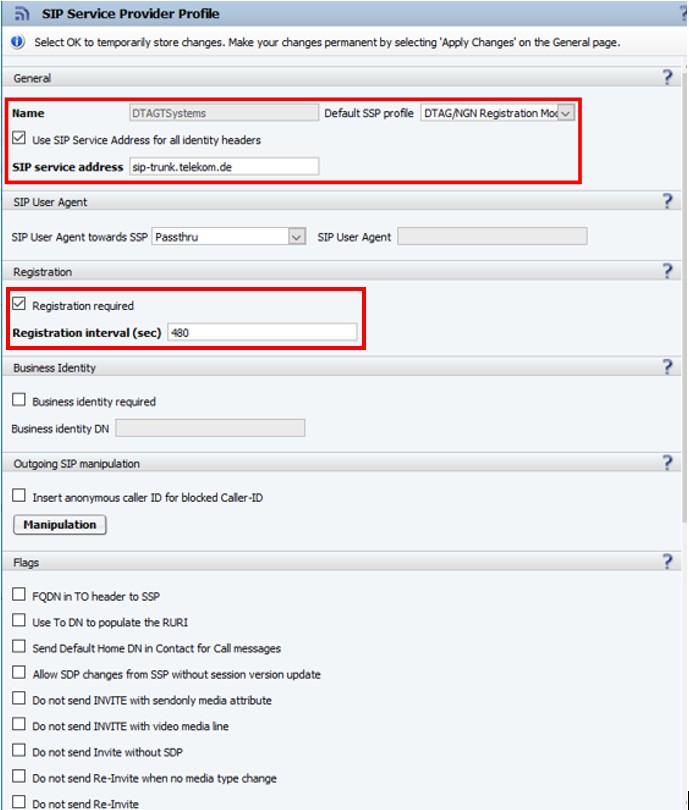
In
the SIP Service Provider Profile window must be selected as default SSP
profile DTAG/NGN Registration Mode. The registration interval has to
be set to 480 seconds:
In the Remote Endpoint Configuration window the SIP Service Provider
Profile shown above has to be selected:
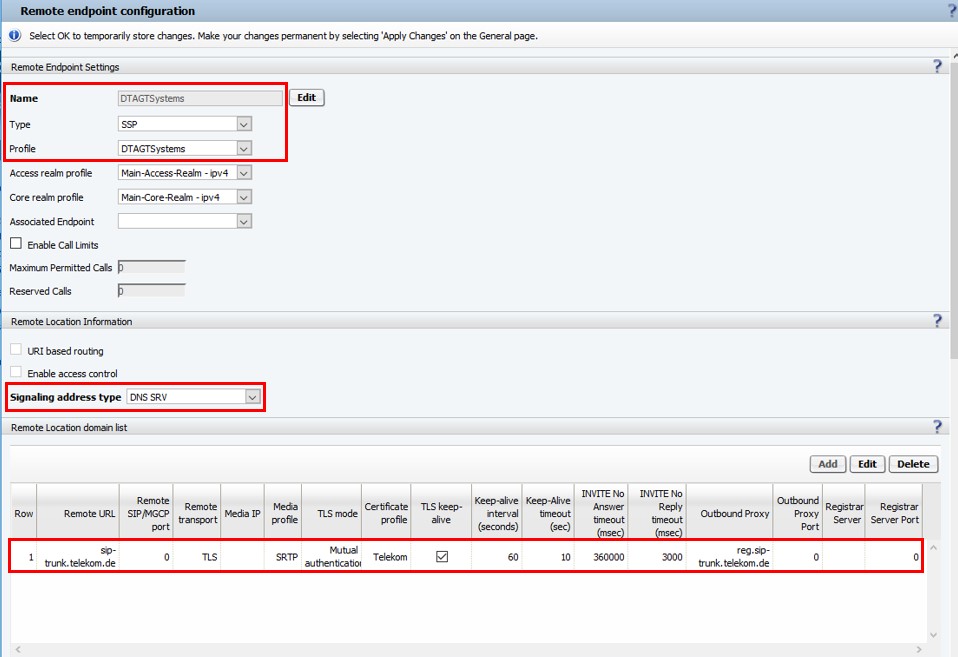
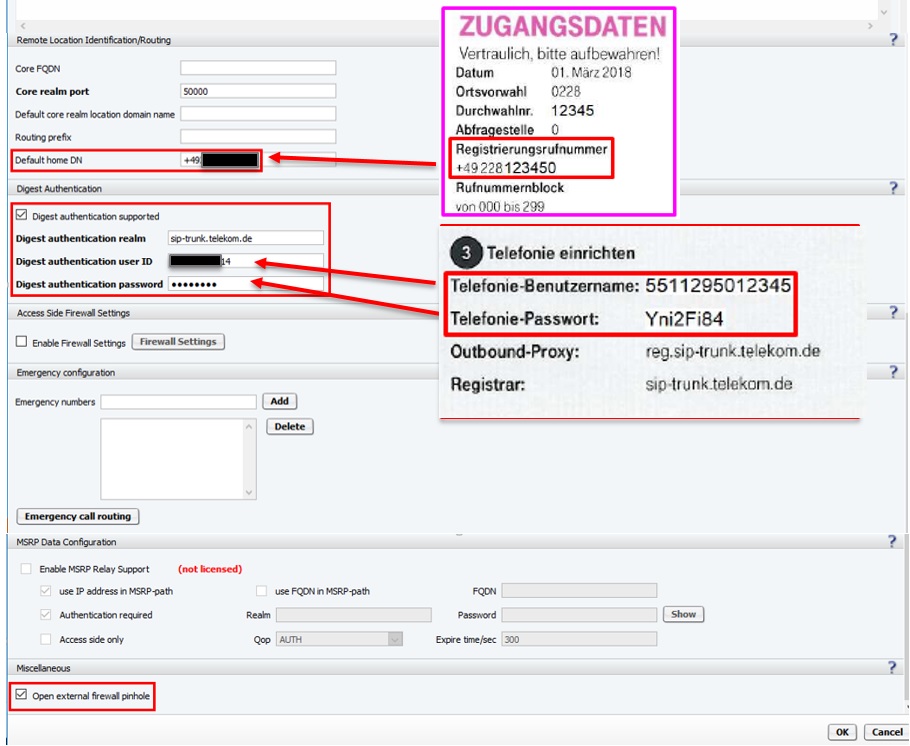
If a NAT router is in between SBC and SIP Trunk Open external firewall
pinhole must be enabled so OpenScape SBC will open the RTP port on the
NAT router by sending UDP packets to let the NAT router pass RTP packets
from a PSTN phone.
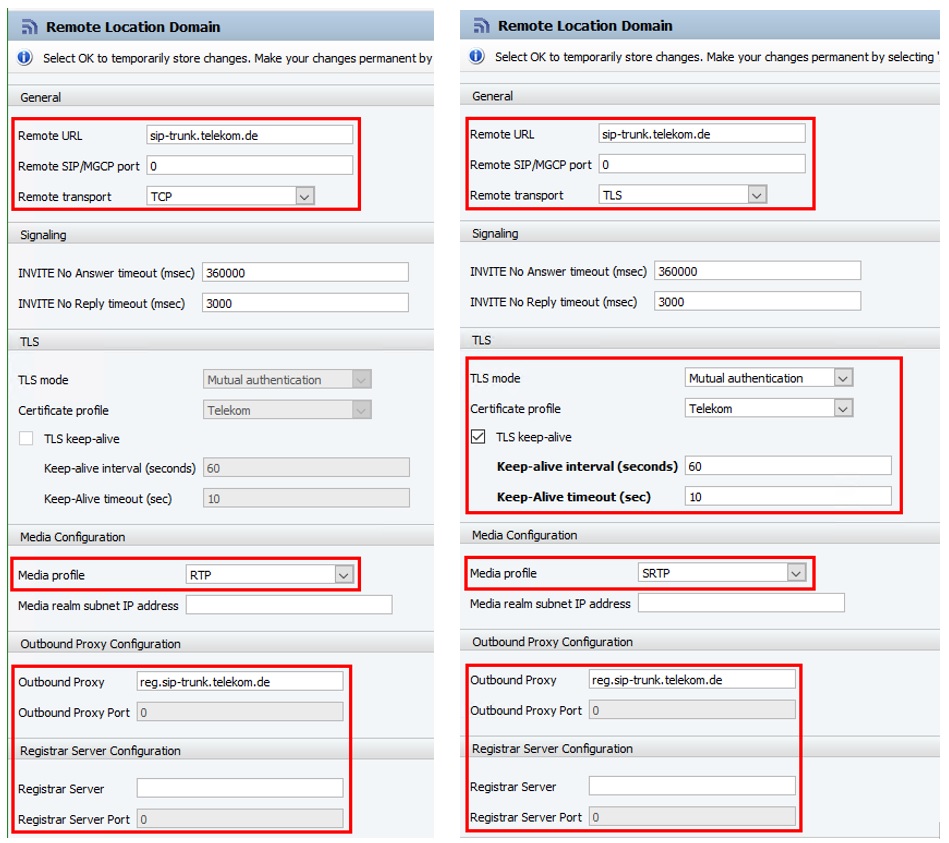
The figures below show the Remote Location Domain window for an unencrypted
SIP trunk using TCP and RTP on the left and for an encrypted SIP trunk
using TLS and SRTP on the right:
5. Preparing and Installing TLS Certificates
For using TLS and SRTP over the SIP trunk uploading and configuration
of the TLS certificates on OpenScape SBC is required:
- Download the Telekom Root-CA-Certificate T-TeleSec GlobalRoot Class 2 from URL:
INFO:
Please make sure that the certificates are still valid. In case they are expired or
not
available anymore, please contact Telekom Deutschland GmbH or use the ones from the
public websites.
Because the OpenScape SBC supports only certificates in pem format
the Telekom ‚Shared Business CA‘ certificate Shared_Business_CA4.der
has to be converted
- via Linux shell e.g. on the OpenScape SBC via command
-
openssl x509 -inform der -in Shared_Business_CA4.der -out Shared_Business_CA4.pem
- or via e.g. online converter https://www.sslshopper.com/ssl-converter.html
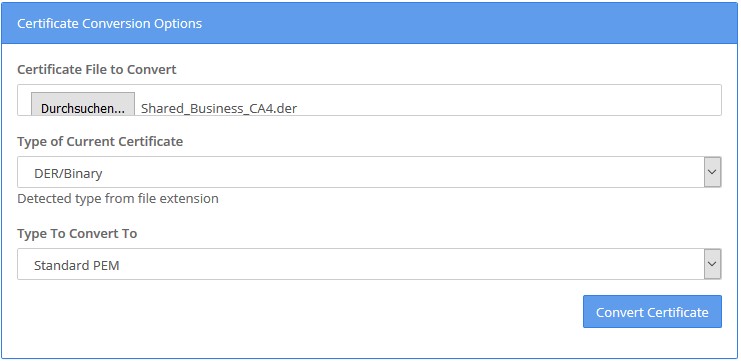
Click
on Convert Certificate and save the converted certificate with
file extension .pem.
Create in the next step a chained certificate based on the certificates
Deutsche Telekom Root CA 1 and Shared Business CA named e.g. dt-chain-ca.pem
and copy the content of this certificate files into it in the following
order:
Because the OpenScape SBC supports only certificates in pem format, the Telekom
"Shared Business CA" certificate T-TeleSec_GlobalRoot_Class_2.cer has to be
converted via Linux shell. For example, on the OpenScape SBC run the command:
openssl x509 -inform der -in T-TeleSec_GlobalRoot_Class_2.cer -out
T-TeleSec_GlobalRoot_Class_2.cer.pem
INFO:
For more information, please refer to the OpenScape SBC V10 Configuration
Guide.
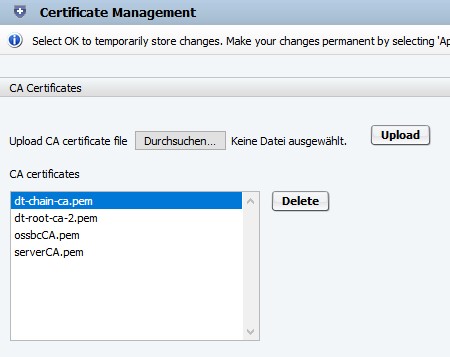
Then upload this certificate via GUI at Security -> General ->
Certificate Management into OpenScape SBC in the in section CA Certificates
by selecting this certificate and clicking on Upload. Then the certificate
appears in the CA certificates list:
To
replace the OpenScape SBC default certificates provided by installation
execute the following steps:
In Certificate Creation section enter e.g. ossbc in the Name field
an click on Create leaving Self signed as CA file unchanged:

In
the CA certificates, X.509 Certificates and Key files
windows appears now the new certificates:
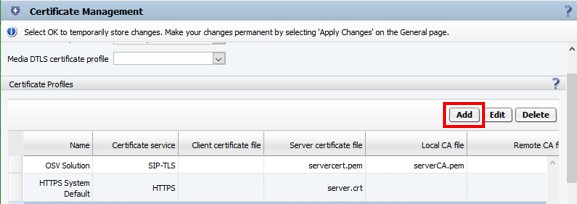
Figure 265. In the Certificate Profiles section click on Add:
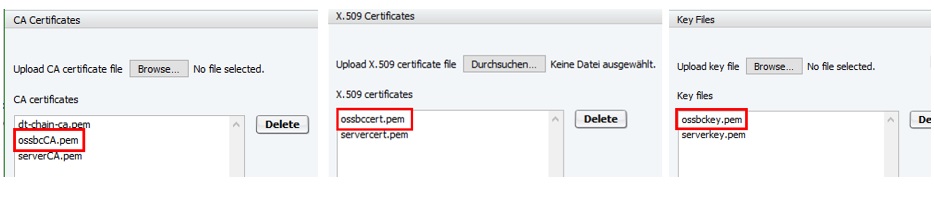
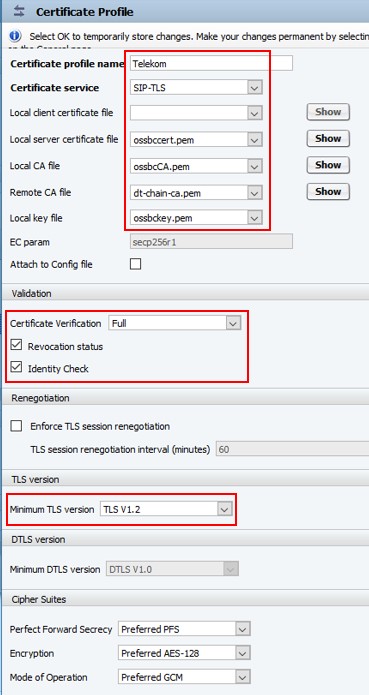
Figure 266. Create a new Certificate Profile selecting the certificates created before:
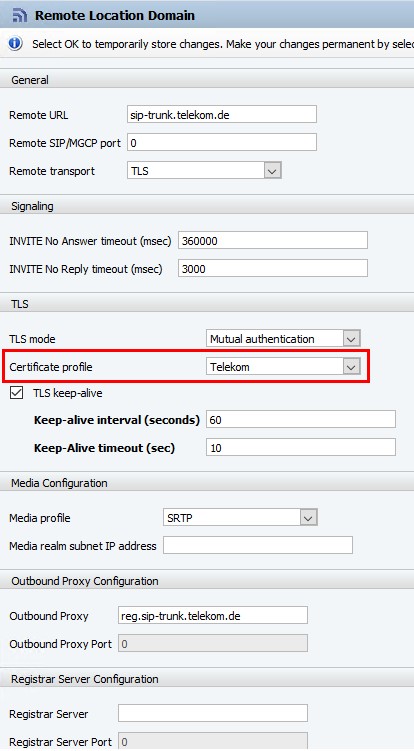
Finally
the created Certificate Profile has to be configured in the Remote
Location Domain window:
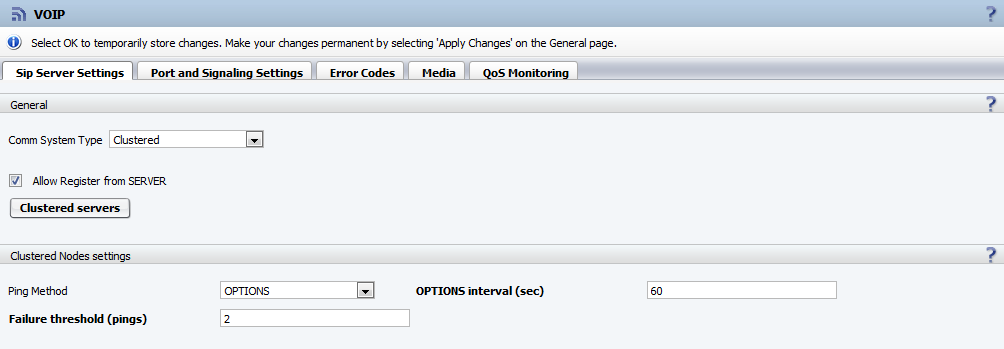
6.Configuration of VOIP Settings towards OS4K
Figure 267. Configuration of VOIP Settings towards OS4K
(Example is using Non-Secure TCP, in case of Secure TLS please adapt
accordingly e. g. 5061)
7. OS4K Gateway configuration (OpenScape SBC Core IP = 172.29.179.80)
(Example is using Non-Secure TCP, in case of Secure TLS please adapt
accordingly to use TLS Ports etc)